This post contains affiliate links. This means that if you click through and make a purchase, The Twin Cedars may receive a small commission at no additional cost to you…we appreciate your support. Full disclosure here.
How to DIY a Lazy Susan
 Walnut Hollow is our gracious sponsor this month and not only did they provide us with a wooden piece (there were 3 to choose from – make sure you make it to the bottom to see all the participating bloggers) but we were also given a wood burning tool.
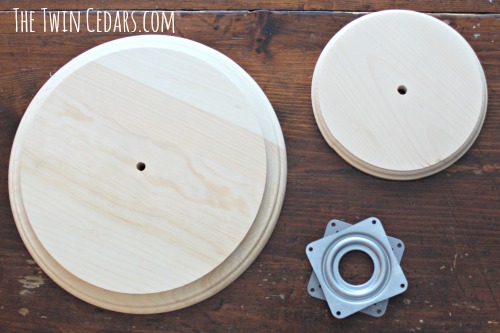 I remember getting a wood burning kit as a child and trying the traceable paper stencils on the little wooden plaques…this bit of experience didn’t make me an expert or even proficient, but I really enjoyed creating the design.
I’m no artist! I thought about using a stencil to outline a design on my piece but I couldn’t find exactly what I had in mind so I came up with something that I could free hand.
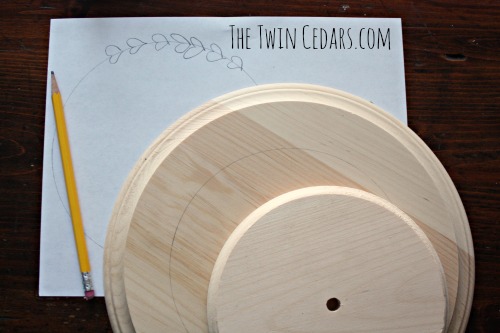 Drawing with a pencil I outlined the smaller round that eventually became the bottom of my lazy susan. Both wooden rounds are from Walnut Hollow and since both are actually for creating clocks they come pre-drilled with a hole directly in the center. Lucky for me because it was super easy to center my circle.
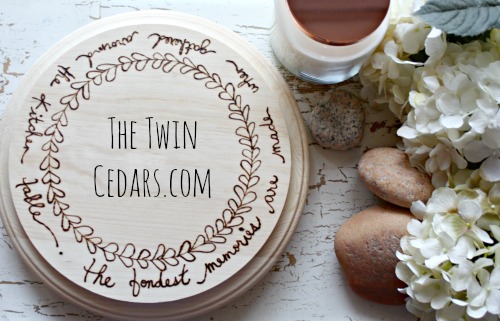
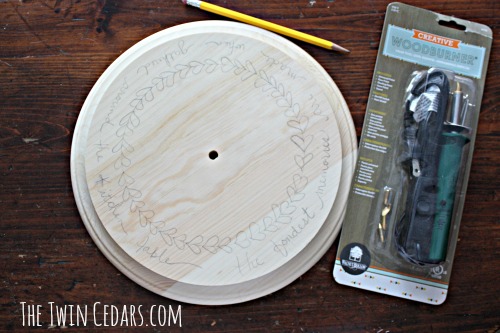 Uneven little hearts lining the circle make up the wreath design and my handwritten saying around the outer edge finishes this simple art piece for our dining table.
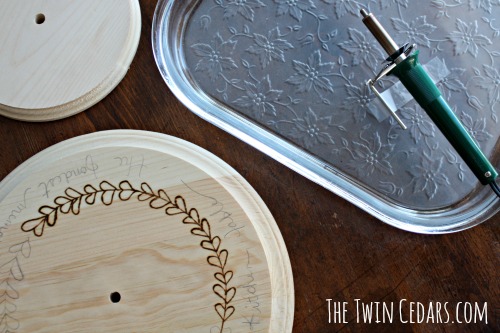 The fondest memories are made when gathered around the kitchen table.
Using the rounded tip – which is recommended for curvy writing, simply burn over your pencil drawing. If wood burning is new to you, I would recommend practicing on the reverse side of your piece. This will give you an idea of how the tool will move over the wood and how long you need to wait until the tool is really hot and ready to go.
For some great how-to videos and inspiration see the YouTube channel from Walnut Hollow. Very helpful!
I’m really happy with the way it turned…although if you scroll through Walnut Hollow’s Instagram you’ll be super impressed and completely inspired! And since you’ll already be there we’d love for you to visit our feed too 🙂
Steps for a DIY Lazy Susan
You’ll need: affiliate links included for your convenience
- large round
- small round
- lazy susan bearing
- 8 short screws – I used 1/2 inch
- drill bit – I used one like this
- electric drill – we have a combo kit like this
With all of your equipment gathered let’s get started.
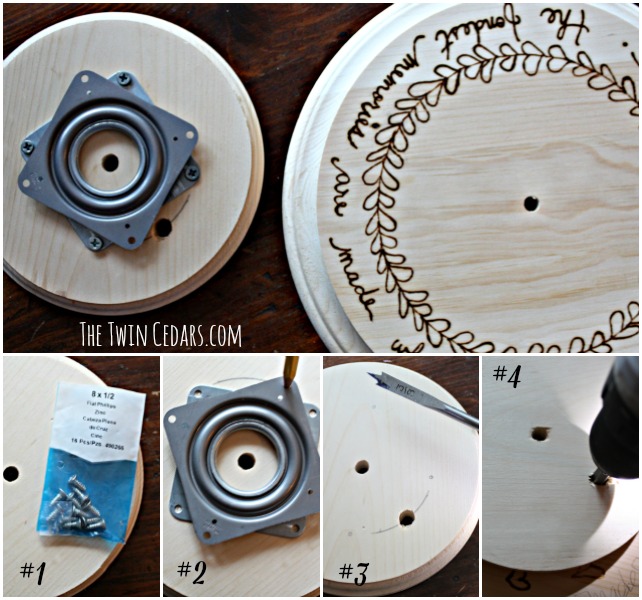
Using the bearing holes as a guide, mark 4 holes with a pencil on the bottom side of the large round. Make certain it is centered. Set aside.
Center the bracket on the small round and screw down.
Using the drill bit create one hole through the small round that will line up with the marks you created on the large round. Using a hole from the top bearing part, draw a flow line – see #2 and #3 above.
Line up the large round with the small round (upside-down) and drill the screws through the hole you created, rotating as you go until all are secured – see #4 above.
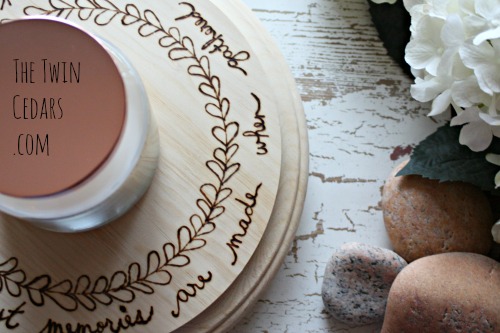
Use your lazy susan on your dining table, as we are,
or as a spice carousel in the kitchen,
a rotating rack next to your sink with dish soap, hand soap and sponges,
top with mini-herb planters and spin for even sunlight…
the possibilities are endless.
 Thank you to Stephanie at Casa Watkins for another great Create & Share Challenge with an incredible sponsor!
Want more? See all the amazing creativity here…



What a great idea – I could definitely use a lazy susan in our home – love this!!
Thanks so much Cathy! Yes, everyone needs one 🙂 It’s so cute on our dining table.
Meghan, I love this project! It’s so sweet, and the quote is so heartfelt. Great idea turning it into a lazy susan! I can’t wait to give that a try.
I loved the quote for this, too! I’d love to see yours. Thanks for stopping by the blog!
What a great idea to turn it into a lazy susan! I was so afraid to use the wood burner, but will need to pull it out now! You did an awesome job with it.
Haha Amy! I practiced with the different tips first and found that the rounded one was the most easy to use. Seemed to glide over the wood smoothly…which is helpful when you aren’t a seasoned wood burner. Thanks!
This is amazing! I love that you went a different way with it and didn’t make it a clock. So fun!
Aww thanks April 🙂
This is beyond beautiful…. it’s simple and perfect! Well done girl!!!
Thank you so much Sara! That means a lot since your projects are so inspiring to me!
Hi Meghan, I love the rustic creative direction you went with this project. Just a really sweet piece that would be at home absolutely anywhere. Super job!
Thanks so much Allie! I super happy with how it turned out. Thanks for coming by the blog 🙂
Great idea Meghan, and I love how you did the wood burning.
Haha, Kristi! I was really worried about that part, but even a little practice and it wasn’t too bad. I’m looking forward to doing more of it. Thank you!
So awesome!! This is absolutely beautiful! I love the burnt design!!! Genius idea. Pinning and sharing!
Thank you so much Stephanie! And for another great Create and Share Challenge this month. Cheer’s to many more!!!
Such a pretty design you created on your lazy Susan Meghan! You did a great job using your woodburner! I hope you are having a great week and take care, Tara
Such a good idea to make this a lazy susan, love the design you added as well!
Thanks Katy 🙂
I would never have thought of making this! Good thinking. I love the design you created, too!
Thank you so much Sarah!
Love Love Love this!!!!! I’m just wondering if you finished the wood with anything or just left it raw.
Hi Adrienne, thank you! I left the wood raw because I really liked the simplicity of it, however I’m using it for things like candle or flower decor on my dining table but if you wanted to make it more durable you could use a wax or poly to finish.